
Share On
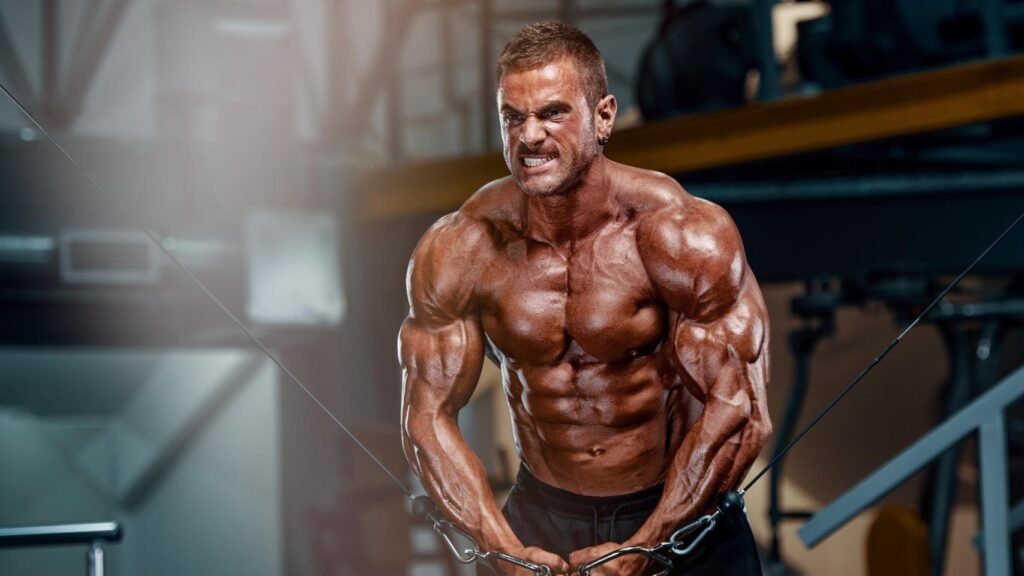
When it comes to chest workouts, I’ve seen countless articles on the internet that simply list exercises, reps, and sets, and then call it a day. It’s as if they’re following a cookie-cutter template, and quite frankly, it’s getting old. I mean, sure, these workouts might help you break a sweat, but are they really helping you maximize your gains and take your chest development to the next level? I don’t think so.
That’s why I’ve decided to take a different approach with this blog post. Instead of just throwing a bunch of exercises at you and hoping for the best, I’m going to focus on the specific exercises that I believe are the most effective for building a powerful, well-defined chest. But that’s not all. I’m also going to dive into the proper execution of each repetition, because let’s face it, form is everything. And if you really want to take your chest gains to the next level, I’ll be introducing you to some advanced techniques like Myo Reps and Lengthen partials. So, if you’re ready to break free from the mundane and experience a chest workout that actually delivers results, keep reading.
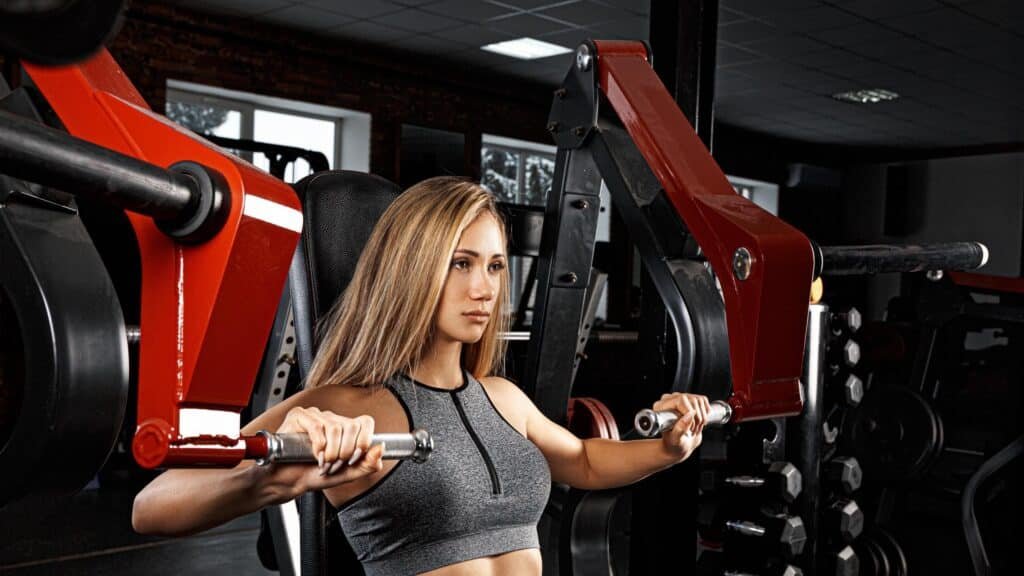
Table of Contents
Advanced Chest Workout
Before we dive into the workout, I want to make one thing clear: this workout is designed for short-term programming. If you want to see consistent results, it’s crucial that you implement this program in four-week blocks, ensuring that you’re varying exercises and focusing on different fitness characteristics, such as strength. The key to getting real results is to properly periodize your training programs.
Chest Workout Builder
Need a chest workout? Try our chest workout builder below.
Directions
1. Start a new thread
2. Input you preferences
3. Chat with the builder to change or replace exercise, sets, reps, and weights
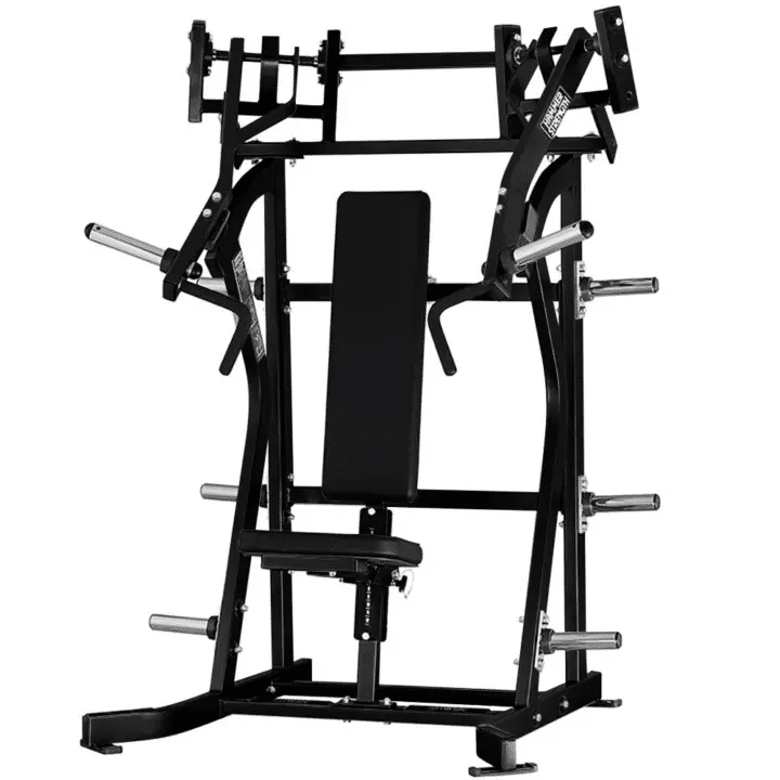
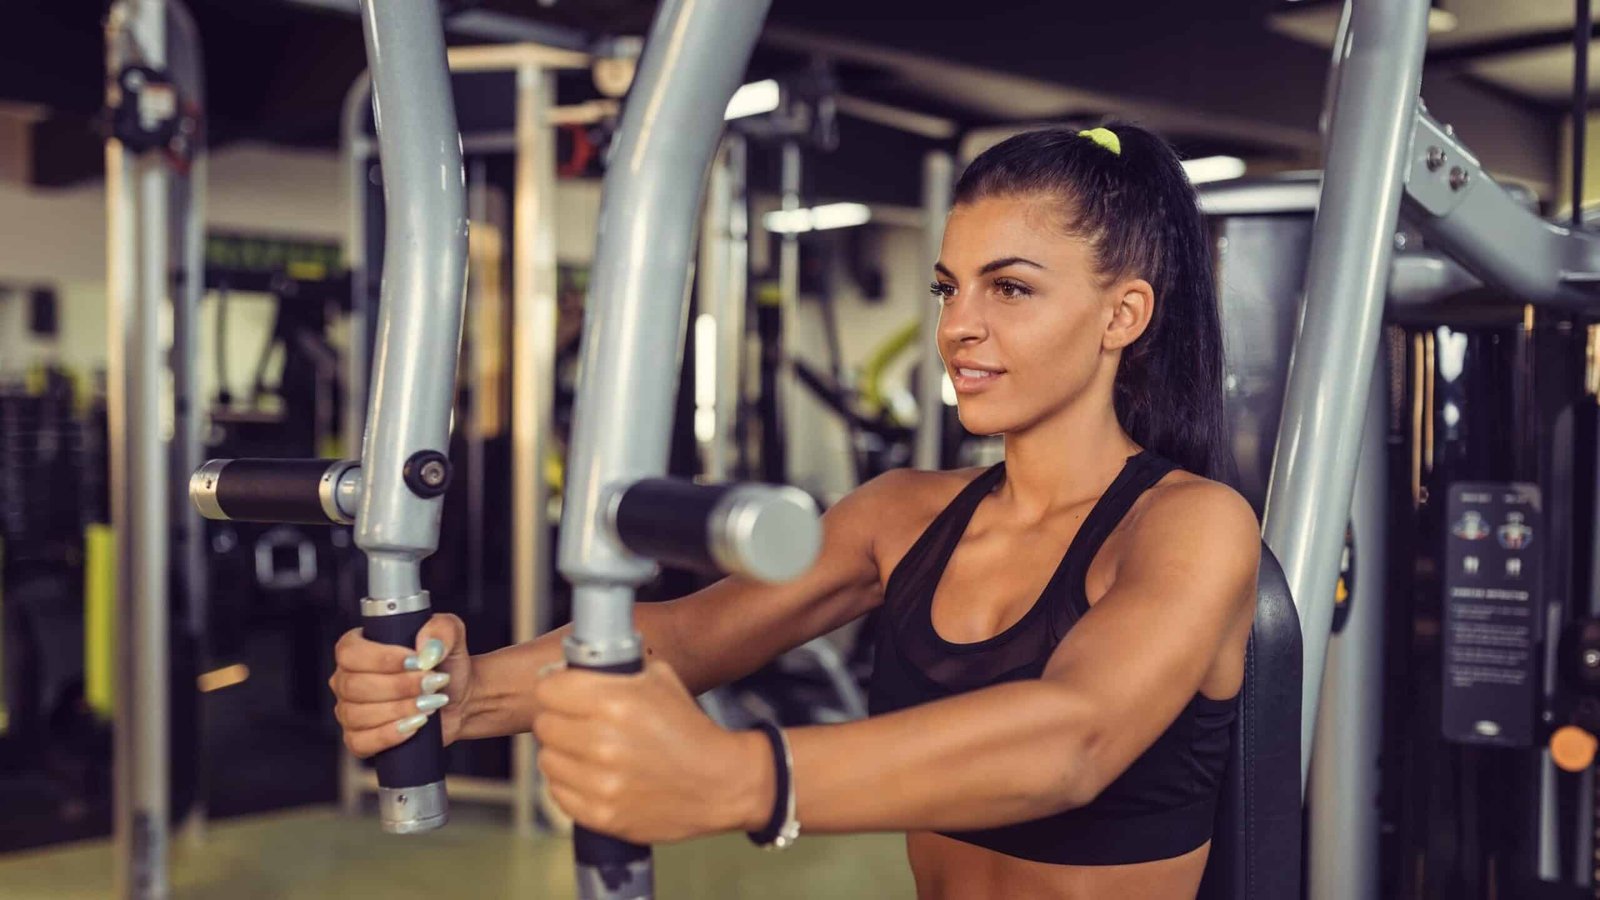
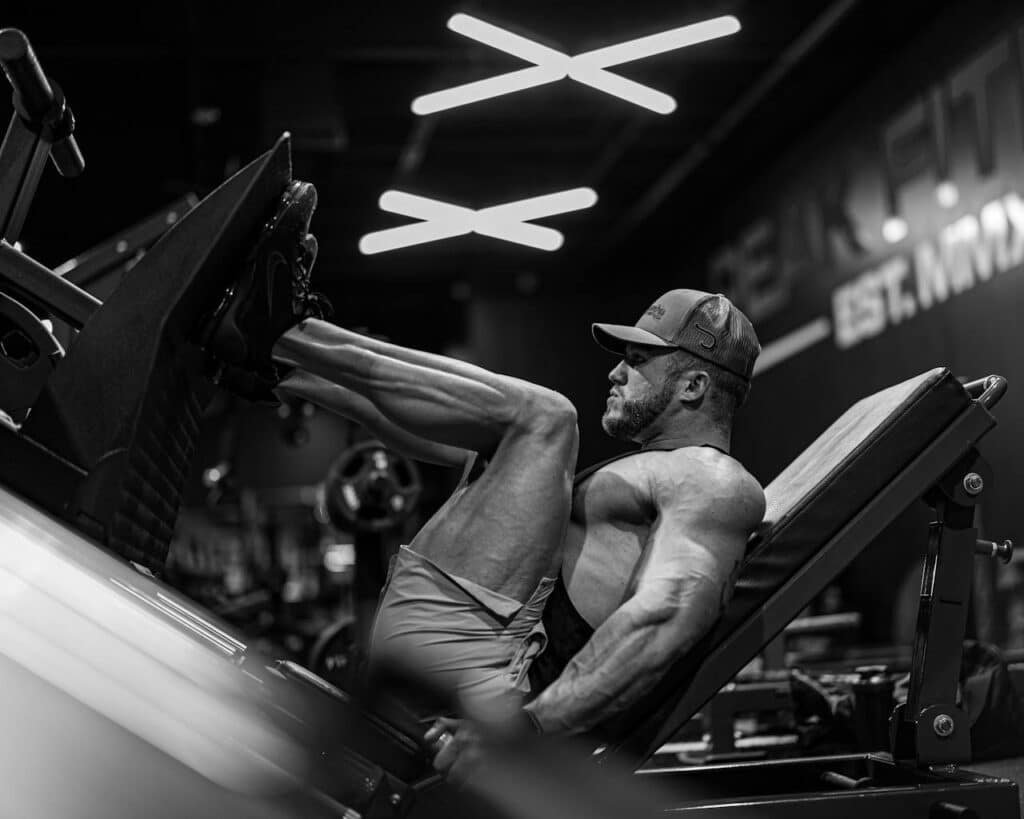
Exercise one: Incline Hammer Strength Press
Now, let’s get to the meat of the workout. The first exercise on the agenda is a classic favorite: the Incline Hammer Strength Chest Press. You might be wondering why I chose to start with this exercise, and the answer is simple. Most people tend to be weakest in the upper chest area when it comes to overall chest development, so I like to target this area first.
The Incline Hammer Strength Chest press primarily works the upper, clavicular fibers of the chest. Additionally, it engages the anterior part of your deltoids and your triceps. What’s great about this exercise is that you can easily overload it and apply various advanced techniques without causing excessive fatigue. This means you can focus primarily on the target muscle without feeling completely out of breath.
Range of Motion
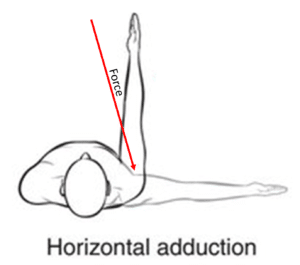
Another fantastic aspect of this exercise is the range of motion. Unlike traditional weights, there is no additional force on the muscle at full lockout. However, the pectoral muscles can further shorten beyond the shoulder joint (i.e., shoulder adduction). Because this exercise converges at the top (lockout), you’ll get the benefit of added force throughout repetition.
The machine’s pivot point also provides a novel stimulus – the resistance increases as you reach the end of the movement, forcing you to work against gravity to a greater degree (accommodating resistance).
So, right out of the gate, this exercise allows us to:
- Focus on the muscle without causing undue fatigue.
- Work the full range of motion, providing a great stretch and a good short range contraction.
- Provides a novel stimulus as the resistance accommodates the end ranges.
Exercise Execution
Proper execution of the movement is crucial. As the saying goes, “leave your ego at the door.” The concentric portion of the movement should be performed with the intent to push each rep with the greatest velocity possible. This is because force equals mass times velocity; the greater the velocity, the greater the internal force imposed on your upper chest. As you descend, however, the movement should be controlled with a two-second eccentric phase.
This doesn’t mean you can’t occasionally sling some weight around; forcing a few reps is perfectly fine as fatigue sets in.
Advanced Techniques
Lengthened Partials
Finally, let’s discuss some advanced techniques that work well with the incline hammer strength chest press. One effective method is incorporating lengthened partials, or half reps. On your last set, as you approach failure, perform 5 to 10 partial reps in the stretched position of the movement. This can help extend the set, increase the pump, and potentially stimulate more growth in the target muscle.
Bands
For advanced lifters looking to take this exercise to the next level, consider adding light jump stretch bands to the machine. By attaching these bands to the handles, you’ll introduce a novel stimulus that increases tension as you reach the end of the concentric phase. This added resistance can help enhance the contraction and further engage the upper chest fibers. However, it’s important to note that this technique is best suited for experienced lifters who have mastered the basic movement pattern and can handle the additional challenge.
Myo Reps
Another powerful technique to employ with the incline hammer strength chest press is Myo reps. Myo reps, short for “myofibrillar repetitions,” involve performing a set to failure, followed by a series of mini-sets with brief rest periods in between. Here’s how it works: after completing your initial set to failure, rest for 15-30 seconds, then perform another set of 3-5 reps. Repeat this process for a total of 3-4 mini-sets. This technique is incredibly effective for inducing metabolic stress and driving muscle growth.
By incorporating these advanced techniques – lengthened partials, jump stretch bands, and Myo reps – you can take your incline hammer strength chest press to new heights and experience incredible gains in size, strength, and overall chest development. Remember, these techniques are best suited for advanced lifters who have a solid foundation in the basic movement pattern and are looking for ways to challenge themselves and break through plateaus.
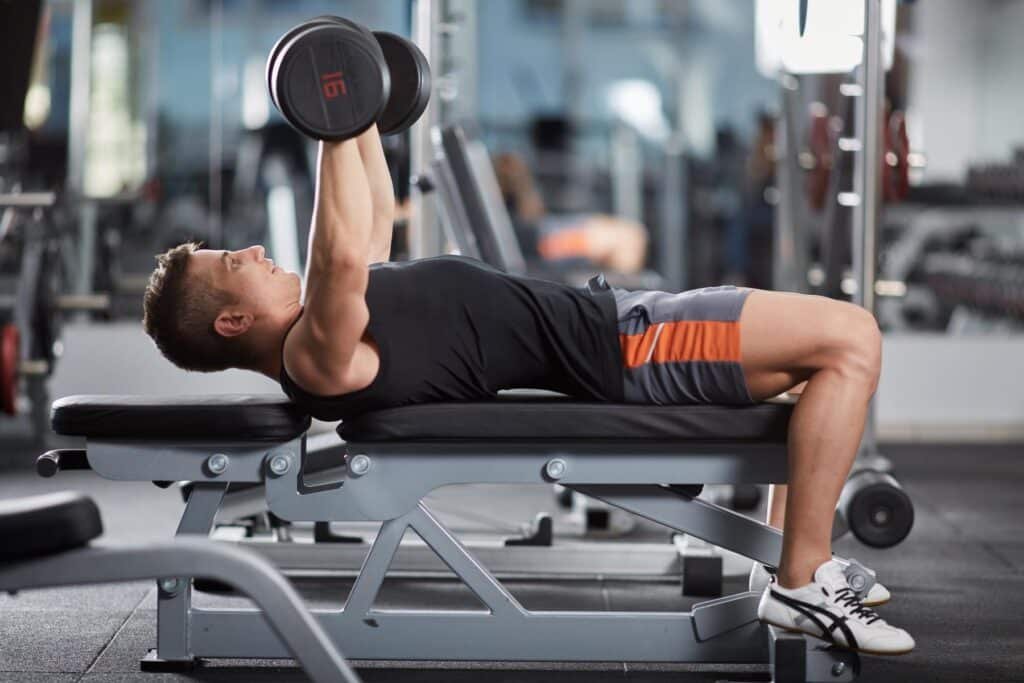
Exercise two: Flat Dumbell Press
The next exercise on the agenda is the flat dumbbell press. I know what you might be thinking – this isn’t really an advanced movement. But here’s the thing: not everything has to be novel to be effective or challenging. I chose this movement for a couple of reasons. First, it’s an overall fantastic exercise for targeting the mid pec muscles. And second, many people find that they can achieve better “activation” of their chest with the flat dumbbell press compared to other exercises like the bench press.
Benefit one
Proper nutrition is crucial for muscle hypertrophy, supporting the adaptation and growth of muscle fibers.
Benefit two
Proper nutrition is essential for muscle hypertrophy, enabling you to push your limits during workouts.
Benefit three
Proper nutrition is needed for continued progress.
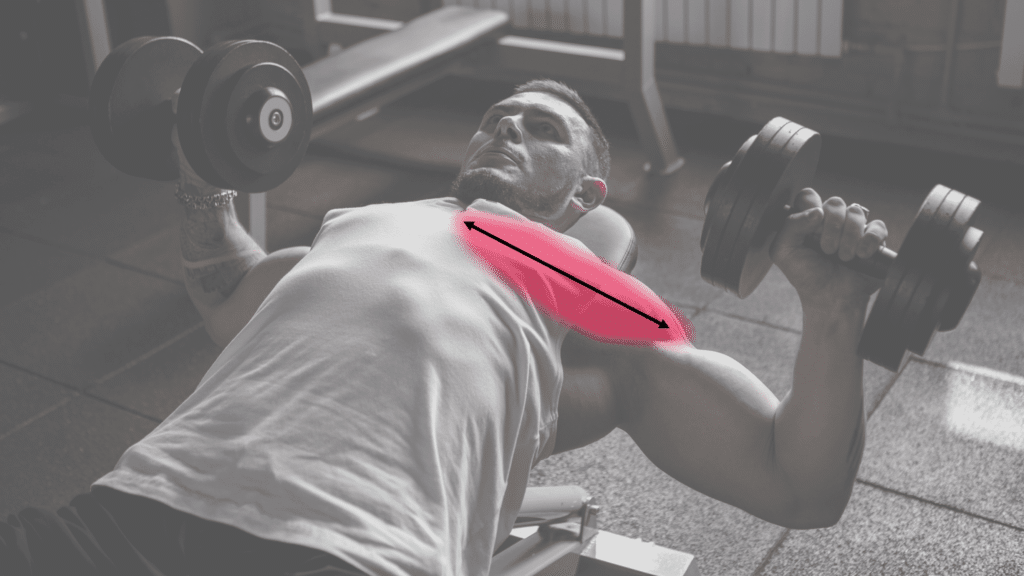
Flat Dumbell Chest Press: Execution and Technique
The execution of the flat dumbbell press will be similar to what we discussed for the incline hammer strength press. The concentric portion of the movement should be performed with explosive intent, while the eccentric phase should be controlled, lasting around two seconds.
However, we’re going to add a little twist to this exercise. During the transition from the eccentric to the concentric phase of the lift, we’re going to eliminate the stretch reflex. To do this, add a slight pause at the bottom of the movement, when your chest is in the stretched position. By incorporating this pause, you’ll effectively remove the elastic force generation provided by your tendons and ligaments. As a result, all the force generated will come solely from the muscle cells themselves.
You may find that the weights you typically use for the flat dumbbell press will need to be reduced significantly when performing the exercise with this pause. Personally, I’m not a fan of dropping weight just for the sake of doing a slower movement. In the next section, we’ll explore some advanced techniques that will allow you to get the most out of this exercise without having to considerably decrease the weight you’re using.
Advanced Techniques for the Flat Dumbell Chest Press
Earlier, I mentioned that adding a pause between the eccentric and concentric phases of the flat dumbbell press will generally cause you to lose a significant amount of volume load. Most people think that dropping the weight for the entire set will allow them to achieve the prescribed rep count for each set. However, I’m not really a fan of that approach. By dropping the weight for the entire set and performing the movement slower with a pause, you’re essentially placing less internal tension on the muscle fibers.
This is where drop sets come in handy for this particular exercise. If you’re not familiar with drop sets, I recommend not incorporating them until you have a solid understanding of the technique. In essence, a drop set involves lowering the weight by about 30% of your working weight when you reach a point of failure, and then continuing the set until you hit your next failure point. This allows you to extend the set and provide additional stimulus to the muscle fibers.
Dropsets Allow you to Extend the Set
So, when you execute the flat dumbbell press and reach your prescribed rep count, simply drop the weight and perform a drop set to achieve your desired total number of reps. This technique will help you maintain a higher level of intensity and volume, even with the added pause during the transition phase of the movement.
Remember, drop sets are an advanced technique and should only be incorporated once you have mastered the basic form and execution of the flat dumbbell press. When performed correctly, drop sets can be an incredibly effective tool for pushing past plateaus and stimulating new muscle growth in your chest.
Exercise Three: Decline Machine Variation
Alright, let’s move on to the next section of our chest workout. Now that we’ve targeted the upper chest with the incline hammer press and the mid pecs with the flat dumbbell press, it’s time to focus on the lower portion of the pecs. For this, I recommend opting for a machine exercise rather than a free weight movement.
There are a couple of reasons why I prefer machines when it comes to training the lower part of the pecs. First, a decline dumbbell press can be a real pain to get into the correct position, especially if you’re working with heavier weights. It can be awkward and time-consuming to set up, which can ultimately detract from the quality of your workout. Second, a decline barbell press tends to limit your range of motion, which can hinder the overall effectiveness of the exercise.
Machine Advantages for Decline Movements
In my opinion, machine exercises are the way to go for targeting the lower pecs. They allow for a greater stretch of the muscle in its lengthened position, which is crucial for stimulating growth and development. Plus, machines provide a safer environment for pushing yourself to failure without the risk of injury that comes with free weights.
When selecting a machine for lower pec work, look for one that allows for a full range of motion and provides a smooth, controlled resistance throughout the entire movement. Some great options include the decline chest press machine, the cable crossover machine (with the pulleys set low), or even the dip machine with a slight forward lean.

Regardless of which machine you choose, the key is to focus on the quality of each repetition. Really emphasize the stretch at the bottom of the movement, and concentrate on squeezing the lower pecs as you press the weight back up. By maintaining proper form and intensity, you’ll be able to effectively target and stimulate the lower portion of your chest, leading to more complete and balanced pec development.
Advanced Techniques for the Decline Chest Press
What I love about using machines for lower pec exercises is that they allow you to easily incorporate a variety of advanced techniques in a short amount of time. These techniques can help intensify your workout. Plus, if you are training with gym partners, applying advanced techniques make the setup faster and easier.
Training to Failure
I mentioned this earlier, training to concentric failure is safer, and in my opinion, less fatiguing when using machines. Because this is your last compound exercise, feel free to take all sets to concentric failure.
Myo Reps
Another advanced technique I love to use is Myo reps, which I discussed in detail earlier. By performing a set to failure, followed by a series of mini-sets with brief rest periods, you can induce significant metabolic stress. Machines are perfect for my Myo reps, as you can easily control the weight and maintain proper form throughout the entire process.
Lengthened Partials
Finally, I often incorporate lengthened partials into my lower pec training. This involves performing partial repetitions in the stretched position of the movement, which helps increase the pump and stimulate growth in the lower pecs. With machines, you can easily set up in the bottom position and perform these partial reps without the risk of losing control of the weight.
By incorporating these advanced techniques—concentric failure, Myo reps, and lengthened partials—you can take your lower pec training to the next level. Just remember, when you decide to use these techniques, always use them judiciously and prioritize safety and proper form above all else.
Accessory Movements: Single Joint Exercise
Now that we’ve covered the upper, mid, and lower parts of the chest with compound movements, it’s time to add in some isolation exercises to provide variation and target the muscles from different angles.
Pec Deck
The first exercise I like to perform after all my compound movements is the pec deck. The advantage of this exercise is that it allows the muscle to be stretched to a greater degree than some of the compound movements can provide. Additionally, it stimulates the muscle in different ways, making it a valuable addition to my workout routine.
Now, you might be wondering how this is an advanced movement. Well, it’s not inherently advanced, but there are some ways that you can execute this movement to make it a little more novel than the ways you’ve typically been doing it.
Advanced ways to execute the Pec Deck
Instead of sitting on the machine, try standing up with your knees slightly bent.
The backpad should support your lower back while allowing you to articulate your upper back or thoracic spine.
Rather than using the handles, place your hands directly on the arms of the pec deck apparatus.
Adjust your arm placement to a position that is comfortable for you as you extend back in the lengthened part of the exercise.
The reason for this adjustment is that it somewhat turns the movement into a decline position.
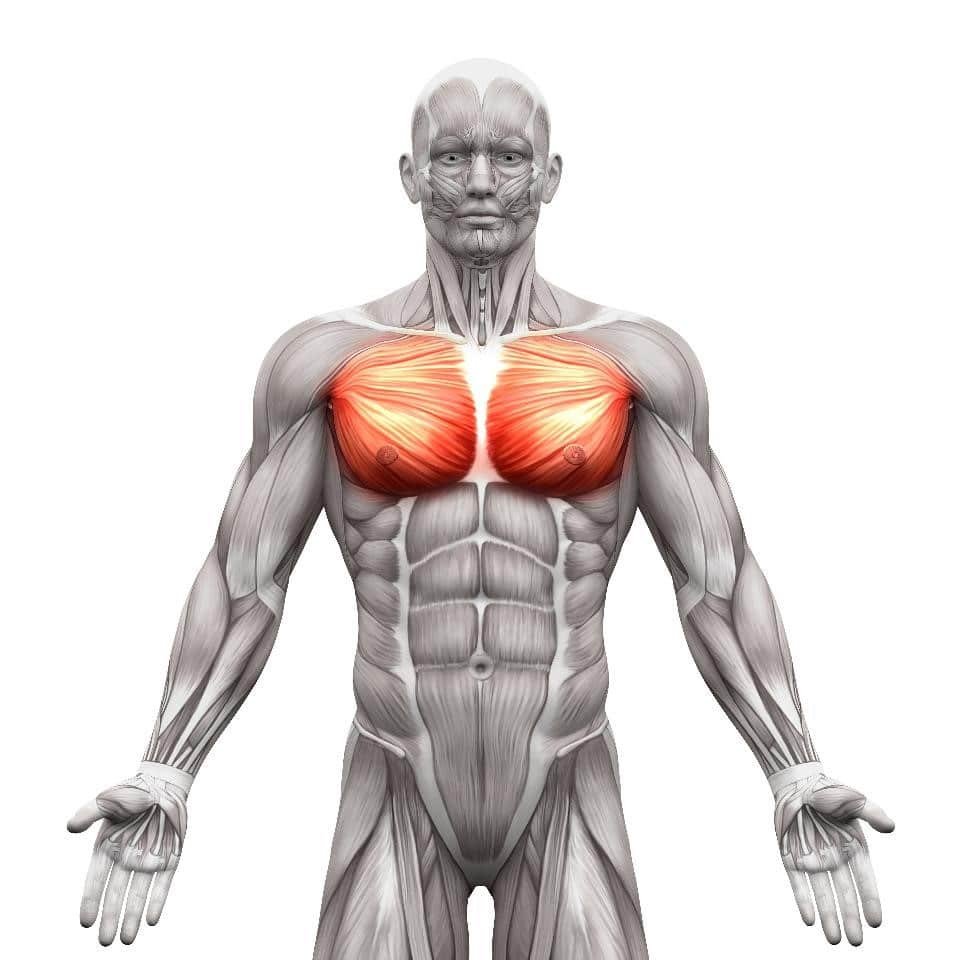
If you look at an anatomy chart, you’ll notice that the chest fibers originate from the upper arm and diagonally go down to your sternum.
This hand placement puts the force directly in line with the muscle fibers.
This machine continues to put tension on the muscle even when you’re in the locked-out position.
This makes it great for both the lengthening and shortening positions of the movement.
By making these simple adjustments to the pec deck, I’ve found that I can really emphasize the contraction and stretch of my chest muscles
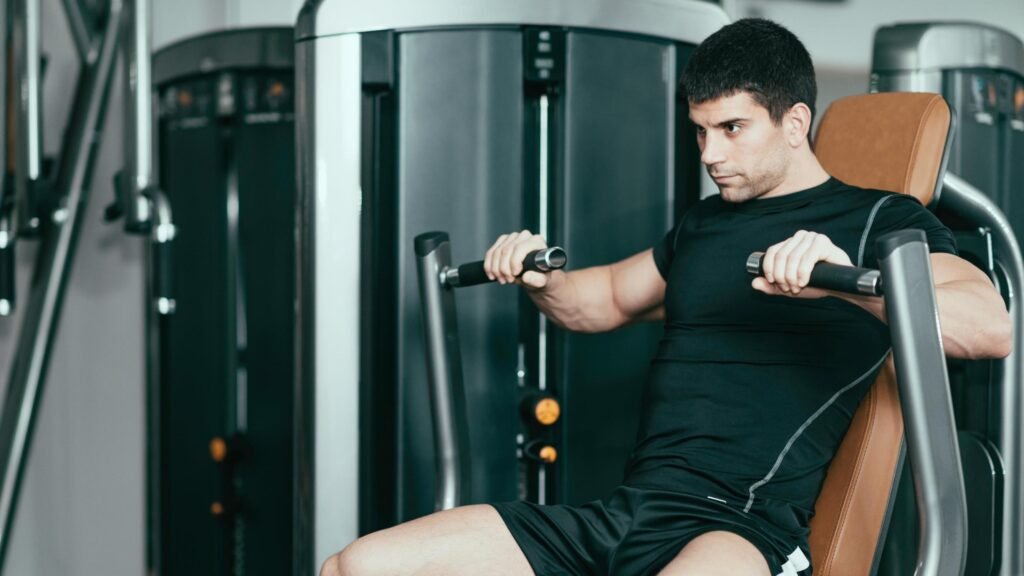
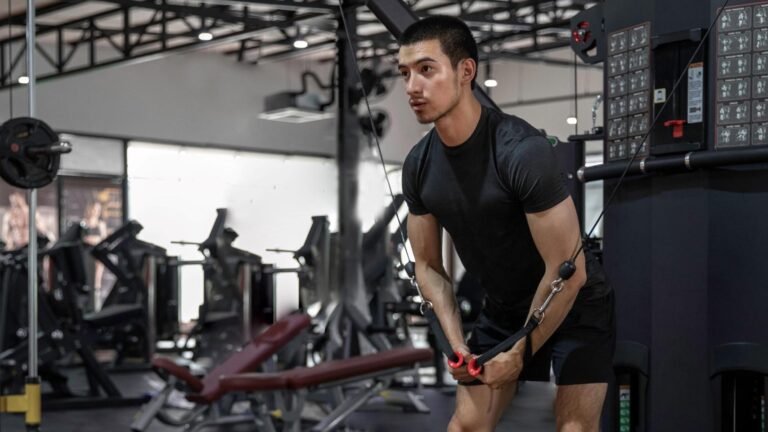
Cable Cross Over
Alright, let’s move on to the final exercise in my chest workout – the cable crossover. This exercise works similarly to the pec deck, and I often use them interchangeably, but what I really like about the cable crossover is that it allows me to adjust the rotation of my hands, whether it’s internal or external rotation.
You’ll noticed that when you rotate your hands outward, you can target a lot more of the lower portion of your pecs. On the other hand, when you turn your hands down, you start engaging more of the middle fibers. This versatility is what makes the cable crossover such a valuable addition to your chest training arsenal.
Summary of Workout
- Incline Hammer Strength Chest Press
- Targets the upper chest
- Focus on explosive concentric and controlled eccentric movements
- Incorporate advanced techniques like lengthened partials and Myo reps
- Flat Dumbbell Press
- Targets the mid-chest
- Pause at the bottom to eliminate the stretch reflex
- Utilize drop sets to maintain intensity and volume
- Machine Press for Lower Chest
- Targets the lower chest
- Allows for a greater stretch and contraction
- Incorporate advanced techniques like concentric failure, drop sets, Myo reps, and lengthened partials
- Pec Deck
- Isolation exercise for overall chest development
- Stand with knees slightly bent and hands on the machine arms
- Adjust arm placement for comfort and emphasis on different parts of the chest
- Cable Crossover
- Isolation exercise for overall chest development
- Adjust hand rotation to target different parts of the chest
- Maintain constant tension and control throughout the movement
These exercises, when combined with proper form, progressive overload, and advanced techniques, can help you build a well-rounded and impressive chest.
Sets and Reps: Muscle Growth
When it comes to sets and reps for this chest workout, I recommend aiming for 3-4 sets per exercise and 8-12 reps per set. This rep range is ideal for building muscle mass and stimulating hypertrophy. However, don’t be afraid to adjust these numbers based on your individual goals and fitness level.
For the advanced techniques like drop sets and Myo reps, I usually perform them on the last set of each exercise. This allows me to push my muscles to their limits and really maximize the growth stimulus. When doing drop sets, I typically do 2-3 drops, reducing the weight by about 20-30% each time. For Myo reps, I aim for 3-4 mini-sets with 15-30 seconds of rest in between.

Remember, the key to progress is consistency and progressive overload. Make sure you’re challenging yourself with each workout and gradually increasing the weight or volume over time.
Nutrition
No muscle-building workout is complete without proper nutrition to support it. To maximize the results from this chest workout, make sure you’re consuming enough protein, carbohydrates, and healthy fats.
Aim for about 1 gram of protein per pound of body weight each day, spread out across several meals. Good sources of protein include lean meats, fish, eggs, and dairy products. Carbohydrates are also important for providing energy and replenishing glycogen stores. Focus on complex carbs like rice, potatoes, and oats, and consume them around your workouts.
Healthy fats, like those found in avocados, nuts, and olive oil, are essential for hormone production and overall health. Don’t be afraid to include them in your diet, but be mindful of portion sizes as they are calorie-dense.
Lastly, make sure you’re staying hydrated by drinking plenty of water throughout the day. Aim for at least 1 gallon per day, and more if you’re training hard or sweating a lot.
Adaptive Workout Builder
Need a training or nutrition program? Try our out Adaptive Workout Builder.
– It provide reps, sets, and weights based on your preferences
– The programs are periodized to provide variety and optimize recovery
– Create nutrition programs based on your preferences
– Includes an AI chat feature for you to change and update your program.
Conclusion
There you have it – my ultimate chest workout for building mass. By incorporating compound movements, isolation exercises, and advanced techniques, you can take your chest development to the next level.
Remember to focus on proper form, progressive overload, and consistency in your training. Combine this workout with a well-rounded nutrition plan, and you’ll be well on your way to achieving the chest of your dreams.
Don’t be afraid to experiment and find what works best for you. Everyone’s body is different, so listen to yours and adjust accordingly. With hard work and dedication, you can build a chest that not only looks impressive but also performs at its best.
Pingback: Maximize Your Chest Gains with This Powerful Myo Rep Workout - Counting Kilos
Pingback: Dumbbell Chest Workout: Target Muscles for Optimal Development - Counting Kilos
Pingback: Mastering Chest Development: Best Exercises Uncovered - Counting Kilos